Alejandra Calle
Cyanotype Experimentation
There aren't many resources out there on how to unconventionally use cyanotypes, so I made them myself. Below is the documentation of everything I've done with cyanotypes and how I did it.
Guidance
My introduction into cyanotypes were just as swift as when I was put into the darkroom for the first time in my life. The smell was awful and unforgettable. I'd be grateful to never use it again if I had the pleasure of doing so. I didn't, and I was instead given ample time to tolerate it. I didn't think I'd use cyanotypes as an artistic medium, and I didn't imagine myself using them in the weirdest way possible either.
With any good investigation, you need to conform to the regular rules of creating a cyanotype. You start off by combining ferric ammonium citrate or ferric ammonium oxalate, and potassium ferricyanide together to make cyanotype solution. I personally use the Jacquard Cyanotype Set. Then, you spread an even coat of the solution onto a surface (i.e. paper) to expose. Depending on the sunlight, time may vary from 3 minutes to over 30 minutes. If exposing indoors, use a lamp that has a 300-400 nm range of ultraviolet light. To set the piece, rinse the solution with water for roughly 10 minutes.
To enhance the saturation of the blue, you pour white vinegar onto a fixed picture and rinse. To intensify the blue given in signature cyanotype examples, you wash it in hydrogen peroxide and rinse. Hydrogen peroxide speeds up the oxidation process that would occur naturally with cyanotype. To decrease the saturation of your piece, use bleach, baking soda, or the like. Toning is also a process to consider. Agents containing tannin 'tones' the blue into a browner color. In some cases, they can turn a cyanotype "black."


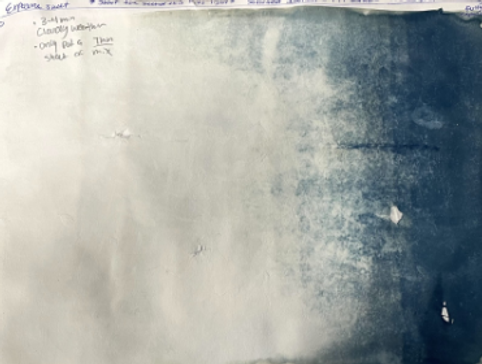
My earliest documented use of cyanotype. These were made for my Darkroom and Video class back the in September of 2022
I didn't like the cyanotype process at first. The darkroom is tight and, well, dark. It was hard to think of it as any different from a photogram or as a "record". Every example used to show cyanotypes were of botanicals, textures, or found objects. For a while, that was the end of it.
.png)
Experimental cyanotype using a denim jacket.
That was, until the summer of 2024. As one of my last summer assignments, I was given the task to create a cyanotype series. This was to my dismay. I didn't have a darkroom, and in reality, I didn't want to do it at all. I still tried to commit and began testing my cyanotypes in the blaring sun.
It worked as well as I thought it would, and I was thoroughly rinsed by the end og it. The days following the first cyanotype tests were of consecutive rain, so I ended up faking the rest. My grade was still high, and I hope admitting this doesn't tank it. You can see for yourself; they look cool even if it isn't very cyanotype-esque.
In a twisted, masochistic way, it was fun. I liked seeing the blue come to life with time, and I started to wonder why it was only ever treated as an archival process. I attempted to looking it up online, but the only results I found were of people converting their art into a cyanotype with stencils or using. Cyanotypes remained as a record keeper.
And so, at the start of senior year, I knew I wanted to do cyanotypes. I needed to start working right away on my AP Drawing portfolio, and I decided to do it using a photographic medium. With my 2 on my AP 2D portfolio, this was going to go wonderfully, but what's more painterly than actually using a brush to apply an aqueous medium? What was more drawful than the charcoal stick to paper? The thing I remembered being the most therapeutic about cyanotype, in retrospect, were the motions made to apply it. Surely, I could do something interesting with this.
And maybe I didn't do enough research, but I never saw people actually use cyanotype as paint. It was merely a means to an end over the marks made of the unbridled sun, so I wanted to change that.
Below are my findings on how to "not " use cyanotypes. These studies were utilized to create my final body of work shown in my AP Drawing portfolio and additional selected works for my senior capstone to be seen alongside the rest of my cohort.
August Week of 8-12-2024

Original cyanotype guide (progress)

Original cyanotype guide (finished)

Guided mini-piece
Commentary:
The first week of actively working on cyanotypes as an artistic medium. I wanted to start off with the basics: what cyanotype is capable of, can it be diluted, what does it look like with other materials on it, etc... Testing the reigns and seeing what I had to work with. This acted as the fundamental principles of what to consider when making a cyanotype. Things I learned were:
-
You can dilute cyanotype solution, the extent of how much you can is studied later,
-
Cyanotype solution will not bind if not mixed well. mix it before use,
-
Layering is possible; however, you have to start with lights and transition into dark,
-
The more dampen your brush, the harder it is to control precise lines,
-
A really diluted first layer works well for an underpainting as it makes marks done later look more prominent in the dark room,
-
Waiting for the cyanotype solution to dry before applying a new coat does not significantly impact the way the final exposure looks, it just has the appearance of a thick watercolor wash,
-
When messing with the ferric ammonium citrate/ferric ammonium oxalate and potassium ferricyanide (B and A respectively), More A in the mixture gives a cleaner result than a mixture with more B,
-
After 6 washes, the paper didn't break. the paper used in this experimentation was the ______________,
-
You absolutely need a lot of pressure to keep this flat, or a heat press.
August Week of 8-19-2024
Cyanotype exposure chart

Cyanotype dilution chart
Mini-project collage style

Mini-project stencil style (hard light)
Mini-project stencil style (soft light)

Mini-project watercolor style

Cyanotype initial guide for weeks experimentation
Mini-project stencil
Commentary: This week was heavy on experimentation and different methods on how to apply and curate cyanotype:
The exposure and dilution charts were created to see the limits of cyanotype mixing. The parameters for the exposure chart were intervals of 20 seconds. The dilution chart was created by adding 2 tablespoons of water to the solution every stripe.
"Collage style" is a digital collaged representation of the stencil. First, several blank cyanotypes of varying dilution were made. Next, the images were neatly cropped and imported into a digital drawing program (Medibang Paint Pro). Finally, I pieced together the different values to make it look roughly similar to the stencil.
-
Despite only having a few shade and tint shifts, the process was exceptionally tedious, and I suggest getting much more color variety.
-
Fun fact: the reason this was made in digital was because of how long the traditional collage was taking.
-
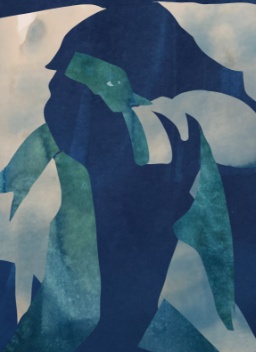
As previously mentioned, stencils were among the more "out there" approaches I found to using a cyanotype. I created 2 stencils out of a basic self-portrait to capturing the whole value range: one was of the actual image (hard light) and one was of the drawn image (soft light). Then, I inverted the image and printed it on transparent film. I took both of these negatives and placed them on cyanotype coated paper. They were in the sun until exposed.
-
Note: when creating a stencil or attempting to create an image using light, use a negative (invert). The light will expose anything not covered, so if you put a positive image on a cyanotype, it will come out as a negative,
-
The more details present on a stencil will give it a greater value range. It will also generally look better, so make sure you're using artwork/ photography with higher value ranges.
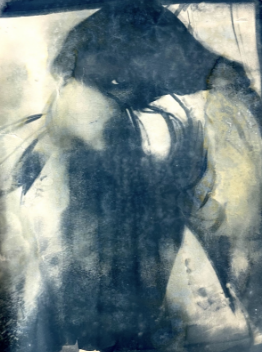
"Watercolor style" is where you add very thin and light layers of cyanotype to paper, placing values roughly where they would be on the original image and layer from there. Once you get all you think you can from cyanotype, you use another medium to enhance the value, in this case, it was watercolor.
-
This is my personal favorite application method as it maintains the most traditionally painterly techniques while still leaning heavily on cyanotypes.
September Week of 9-2-2024


Testing cyanotype thickness
Testing cyanotype density
Proud test piece. Genesis 1:1

Test cyanotype midtones

Cyanotype exposure to sun
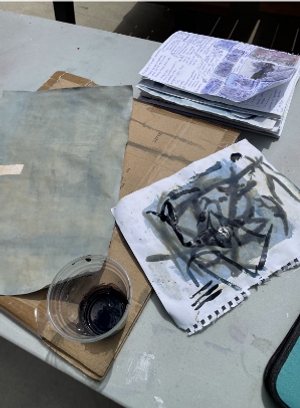
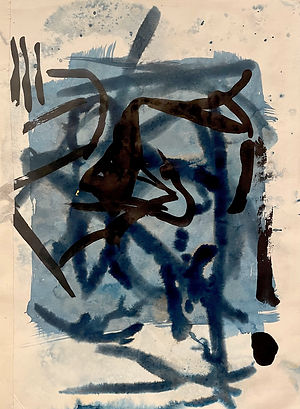
Cyanotype brush stroke practice
One of many set-ups
Commentary: The first two weeks were testing the limits of curation regarding cyanotypes, and I wanted to see how far the limits could be pushed. I broke the first rule of cyanotype and used it outside, directly exposed to UV. In some specific tests, pieces didn't get time to completely dry before a new coat was applied.
-
Layering is possible; however, you have to start with lights (diluted solution) and transition into dark (higher concentrations),
-
The more dampen your brush, the harder it is to control precise lines,
-
When used in this way, cyanotypes turn out to have darker marks than regular washes,
-
In the containers using cyanotype, the layer the most directly exposed to the sun starts to react and mixes with the rest of the solution when agitated. This looks like a darker precipitate forming inside the mixture. It is unclear whether this makes marks thicker or darker in color.
September Week of 9-23-2024
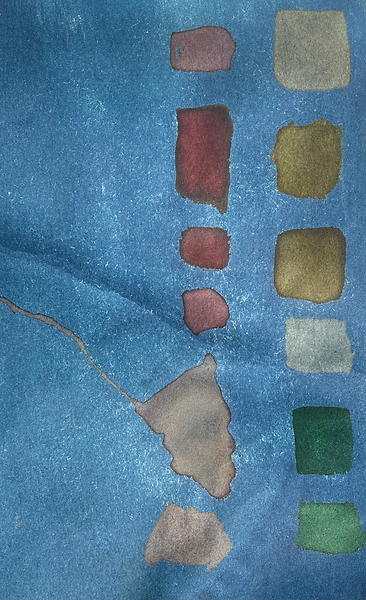
Figure 1: unwashed, no dilution

Figure 2: washed, heavy dilution

Figure 3: red, yellow, green dyes
Commentary: Can cyanotype have color? Whenever I've tried searching up what colors I could make from cyanotype, all I ever got back was the same Prussian blue. I tested various methods of applying food coloring to 3 different cyanotypes (No cyanotype, no dilution, heavy dilution). There was a dry application of food coloring then a wash of cyanotype, cyanotype mixed with food coloring, and adding food coloring to a paper washed with cyanotype only.
-
Leaving the food coloring undisturbed on cyanotype-washed paper creates the brightest saturation of color.
-
Yellow is the most prominent color on each of the tests.
-
When washed with water, the food coloring comes out and leaves a dark, roughly colored stain as well as a run-off trail,
-
Mixing colors is possible but doesn't work the best when trying to create lighter colors,
-
The darker washes on the right side of each coloring are the dyes mixed with cyanotype, which is how darker tints can be made.
-
The line in the middle of figure 3 is all cyanotype mixed dyes added together to make brown.
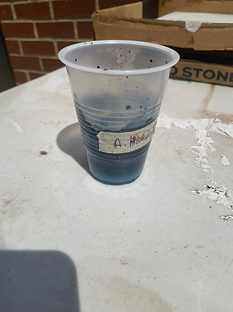
"A. Homunculi"

Additional notes: Also, as part of this week's investigation, I wanted to see how long a cyanotype could stay out and what color would be made if I mixed all dye together. They were playfully named "A. Homunculi" and "A. Bile" respectfully, mainly to make sure people wouldn't throw them out. Cyanotype loses its best results after 2 hours unexposed but can still work after a few days. It stopped effectively sticking onto paper after a week. "A. Bile," or equal parts red, yellow, and green dye make a light brown with more of a reddish undertone.
"A. Bile"
December Week of 12-9-2024
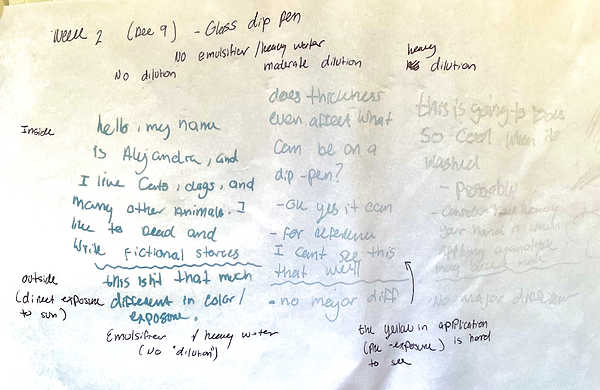
Figure 1: Glass Dip Pen dilution guide
Commentary: At this point I've mapped out all I wanted to about the unconventional use of the solution, but what can be done for its application? So far, I've only used larger brushes when addressing this aqueous medium, and the results are what you would expect: large unintentional blobs from oversoaking, too thick of lines, messy. Even with using a smaller brush, getting fine details effectively without the solution bleeding through is difficult, so I wondered if glass dip pens and pens would work. For this I used cyanotype solutions with no dilution, slight dilution (3 tbsp), and heavily diluted (6 tbsp) for this practice.
-
The dip pen works for fine details with out heavy bleeding, just be cautious of your hand weight.
-
Cyanotype solution with no dilution produced the best results.